Transforming the Neckline: From Jewel to V-Neck on My Fairy Boutique Jacket
Hello, my quilty friends Today, I'm excited to share a step-by-step guide on how I transformed the neckline of my Fairy Boutique jacket from a jewel neckline, that I did not like, to a V-neck that I LOVE. Let’s dive into the process!
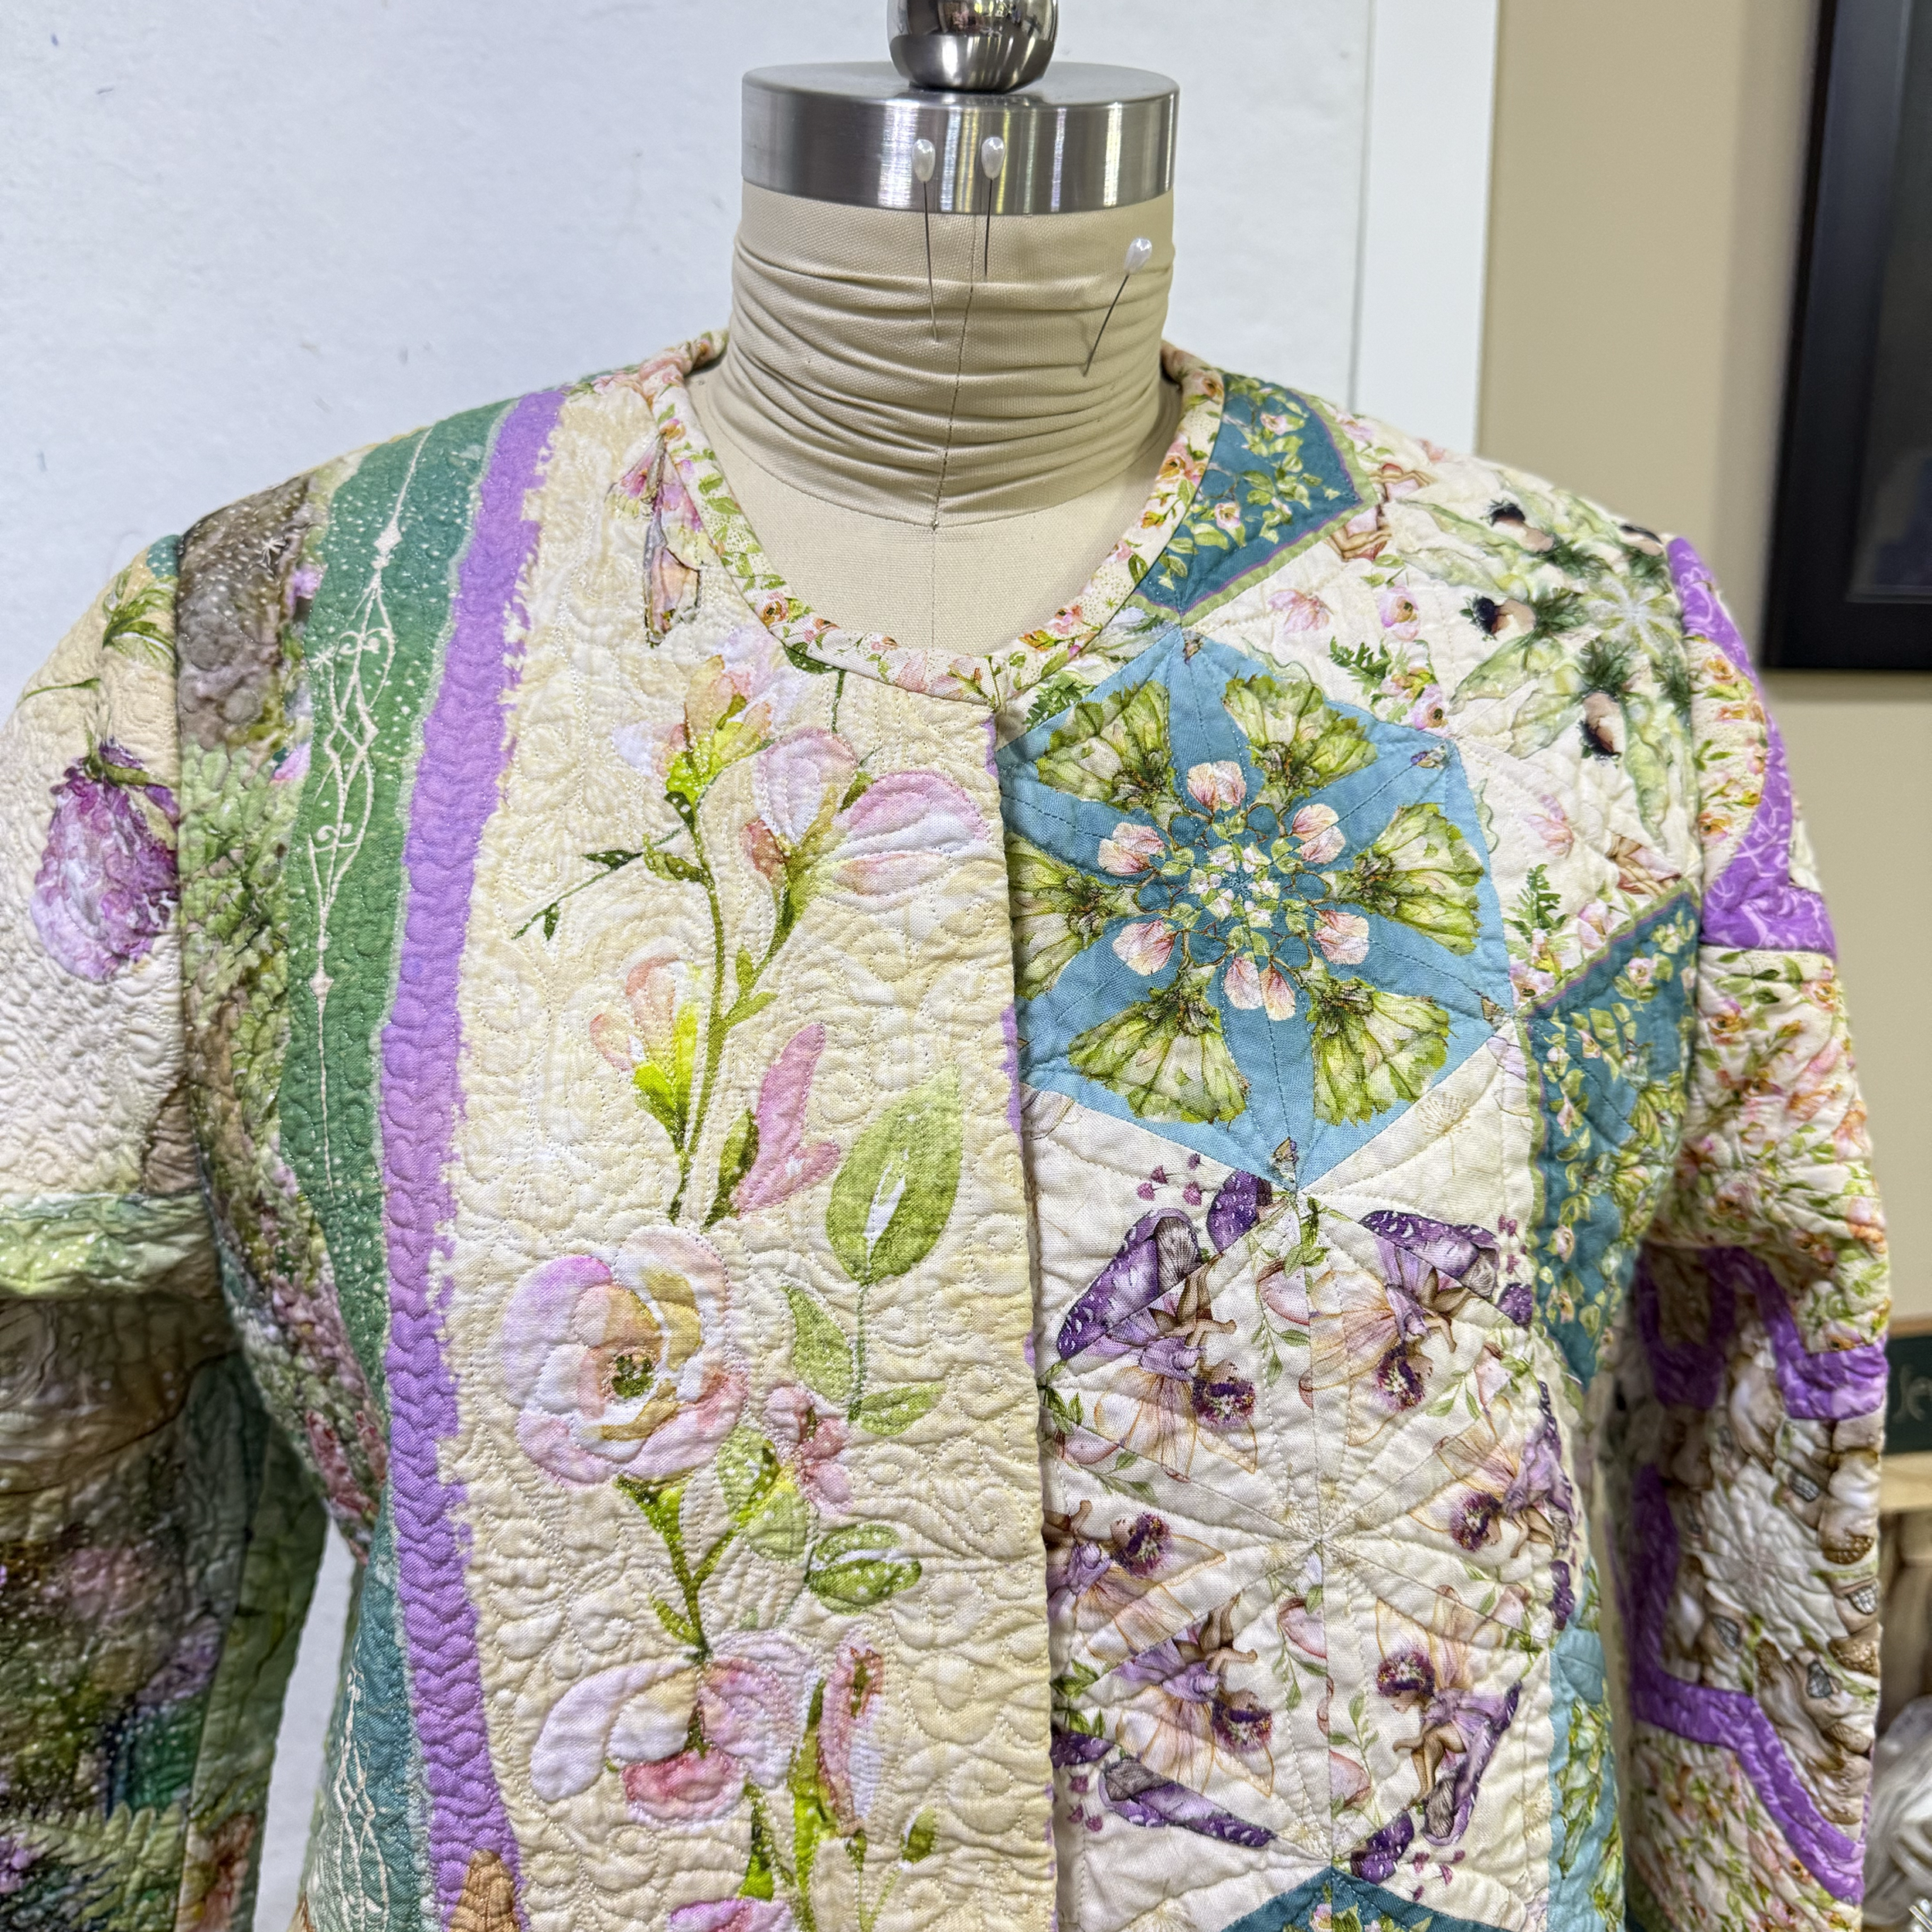
Neckilne started like this.
☹️

Step 1: Fold Back
To start, I folded back the neckline to where I wanted the new V-neckline to be.
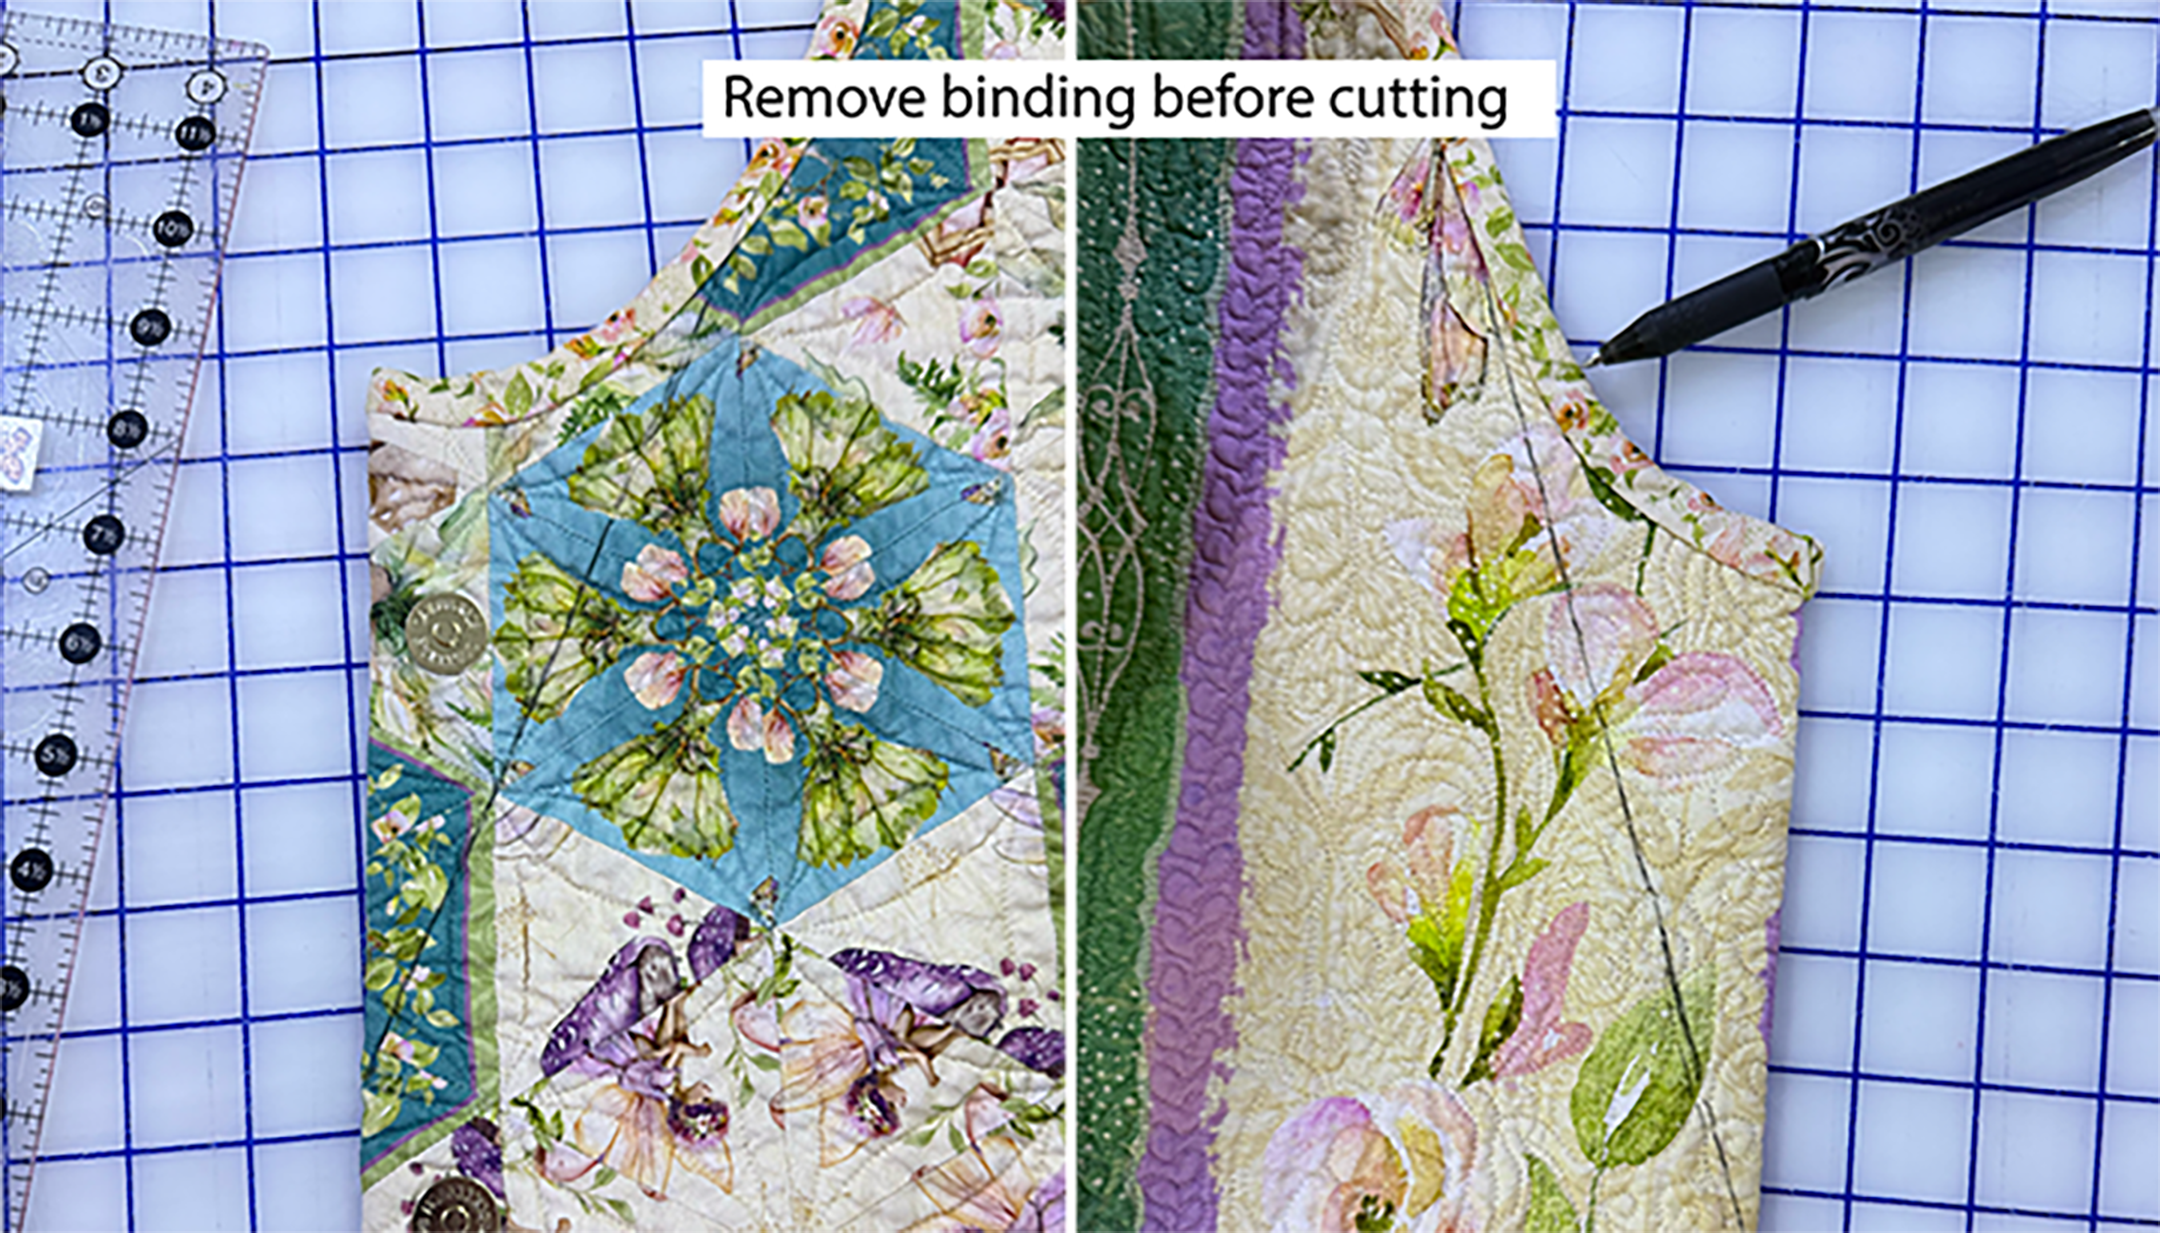
Step 2: Measuring and Marking
I then measured down 2 inches from the shoulder seam on both sides of the jacket. Using my friction pen, I made a little mark at this measurement. This will serve as the starting point for the V-neckline. I made a second mark at the point that my V would end. With my markings in place, I drew a line connecting the two points, creating the shape of the V-neck.
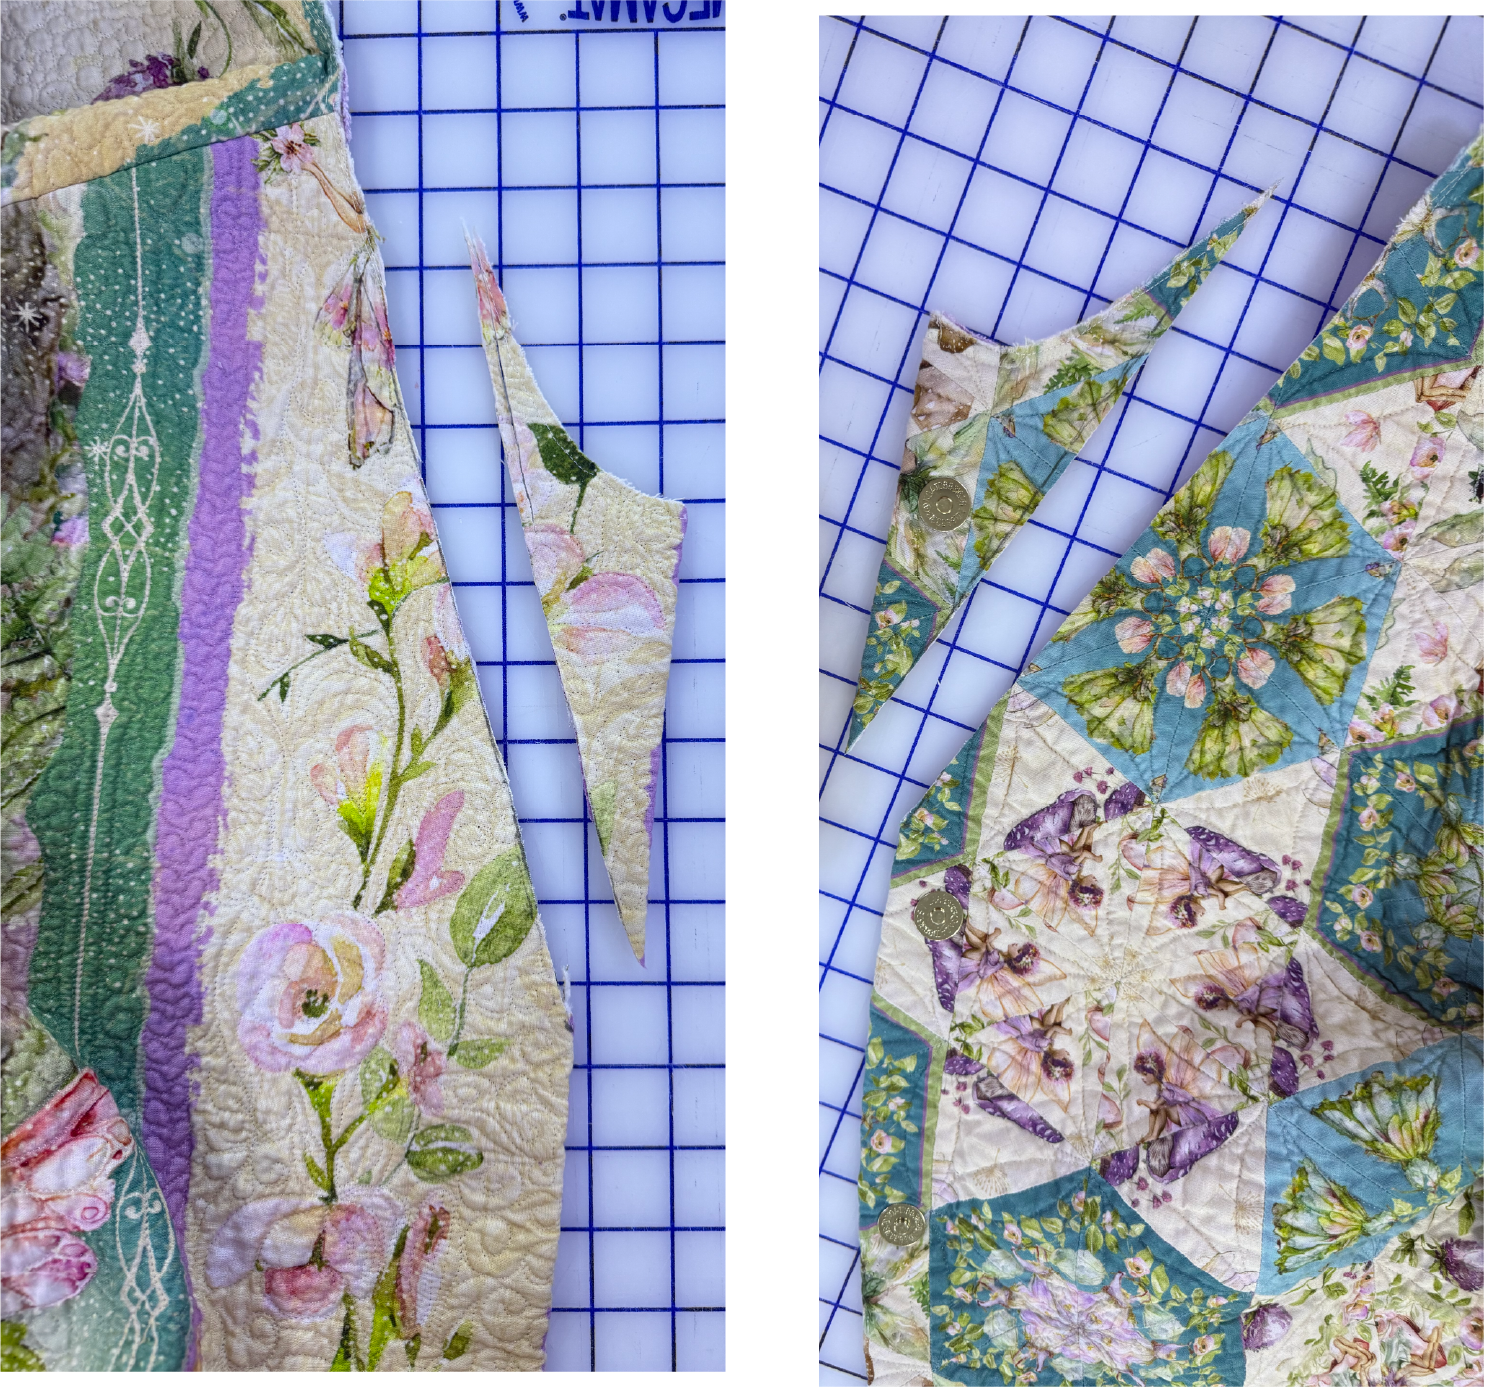
Step 3: Trim Along the Marked Line
Using the mark I made earlier, I trimmed along the line to create the new V-neckline. I was careful to avoid cutting my magnetic snap.
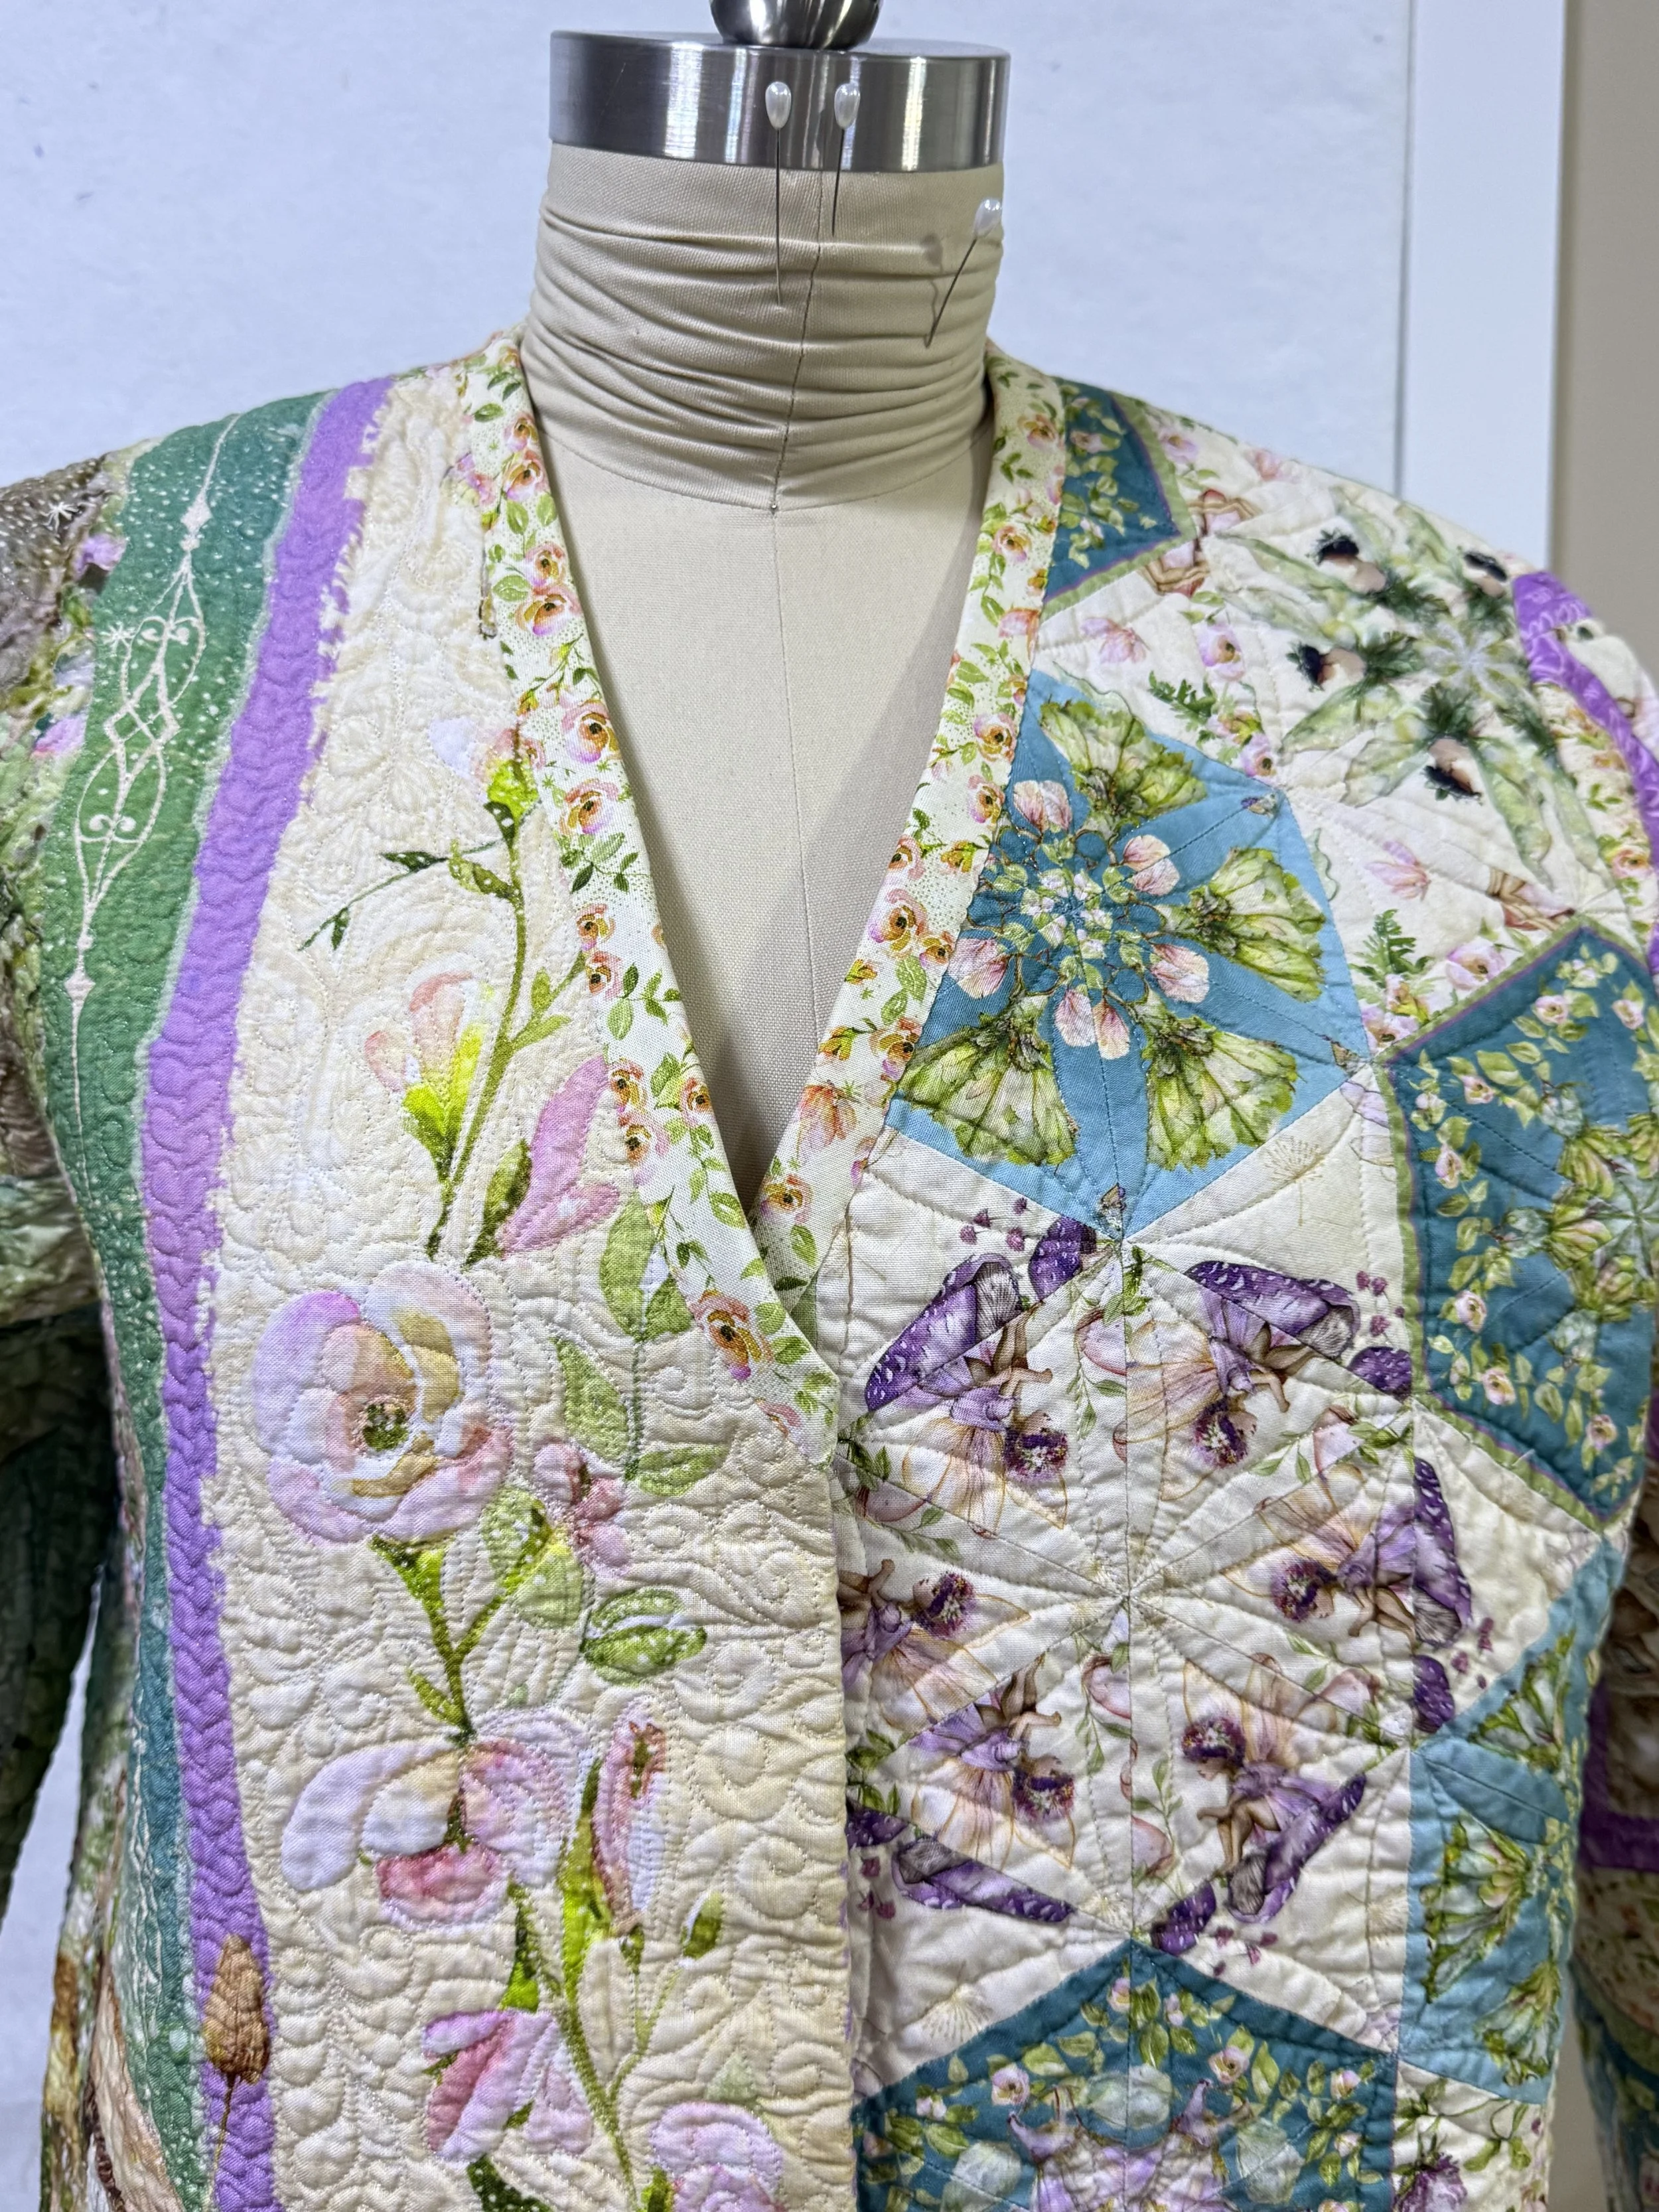
Step 4: Replace with New Binding
The only thing left is to add some fresh binding! I replaced the old binding with a new piece and that was that! I LOVE it now!!